Modern construction offers new strategies that guarantee excellent results in the shortest possible time. Semi-dry screed – a German technology that has proven itself with high efficiency and minimal financial costs. When performed by professionals, the surface does not require finishing and is ready for laying the final coating earlier than with a regular wet screed.
Semi-dry screed technology with your own hands is a simple solution for many homeowners who want to save on repairs. A detailed description of all the stages is provided below.
What is needed?
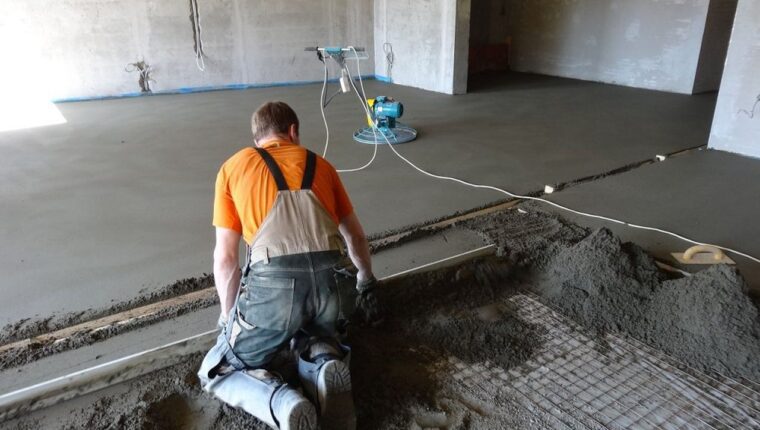
It is important to understand that the speed and quality of the screed are primarily determined by professional equipment. This technology involves the use of a pneumatic hammer and a vibration trowel machine. The semi-dry screed can be applied on a monolithic slab, wooden floor, or well-compacted and prepared ground. The surface must be well compacted, and a film must be laid on it to provide waterproofing and prevent rapid moisture loss to the base.
Materials used include a cement-sand mixture. Reinforced fibers improve its properties, and in some cases, expanded clay, granite crumb are added.
Performing a semi-dry floor screed with your own hands in an apartment will become a great foundation for any coating: tiles, laminate, linoleum. A step-by-step guide for the semi-dry screed technology with your own hands.
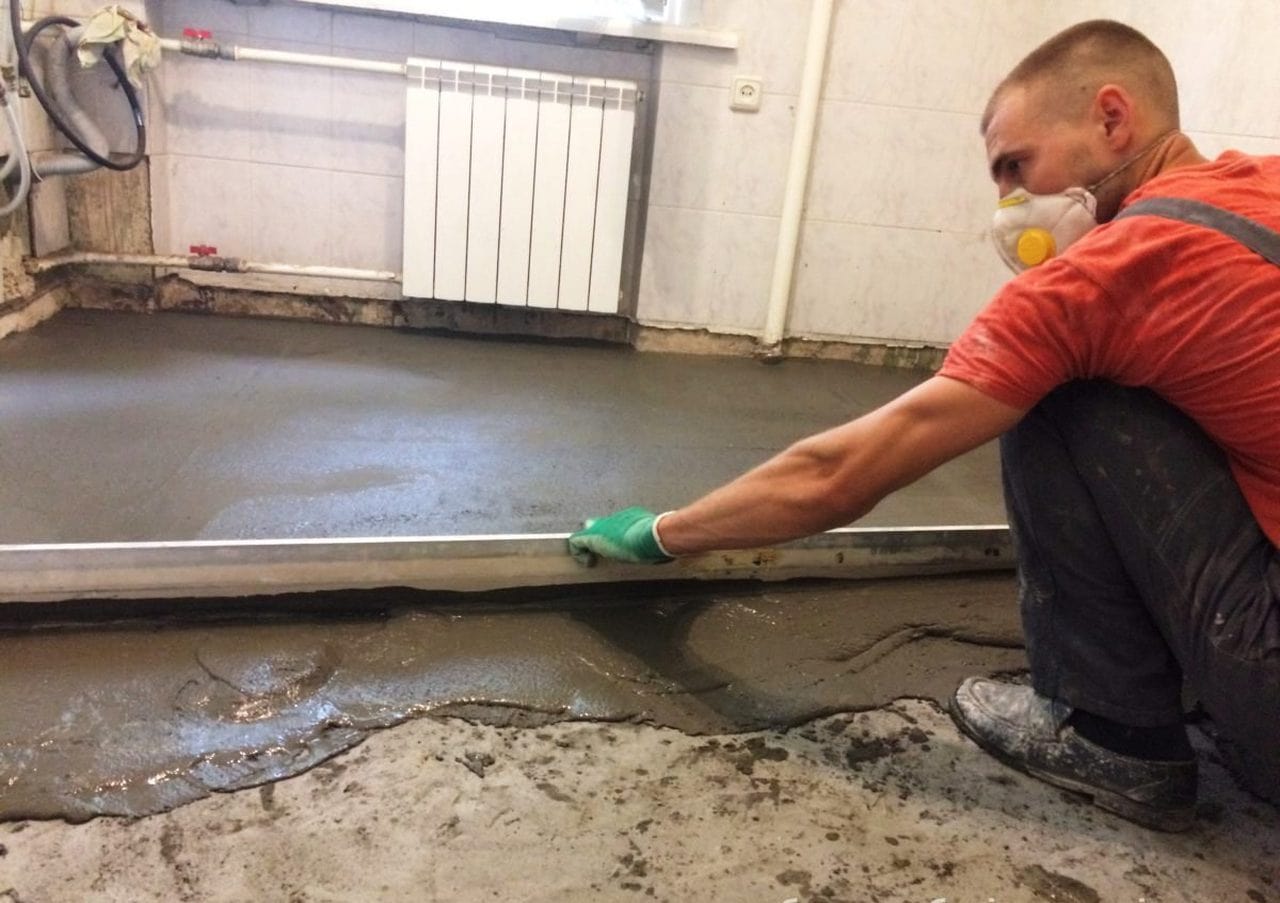
The process includes four main stages
- Preparation of the base. The surface is cleaned of foreign objects, cracks and joints are sealed. Thermal and sound insulation are installed, and a waterproof layer is laid: isolon, PEE, or polyethylene. A damping strip is fixed around the perimeter, separating the walls from the screed. At this stage, the floor marking is performed, and the level and boundaries of pouring are determined. This procedure requires experience and qualification to draw a horizon line throughout the apartment. For visual level indication, beacons are installed.
- Creating the working mixture and presenting it on-site. The technology is characterized by quick assembly – it is allowed to walk on the floor after 12 hours. Cement and sand are mixed in a container in a ratio of 1 to 3.5 – 1 to 4. Reinforced fibers are added at a rate of 40 g per 1 m2 (calculated for a thickness of 50 mm). A liquid is added to the dry components in a ratio of 5 parts mixture to 1 part water. The ratio is specified for M500 cement grade and may vary depending on the type of cement and layer thickness. Many do not consider that mixing should be performed by equipment when making semi-dry screed with their own hands. Only in this case does the mixture become homogeneous and of optimal consistency. To simplify manual mixing and increase convenience during laying, a plasticizer is used. We recommend using ArmMix plasticizer with low consumption – only 1 liter per 20 m2. The ready mixture is supplied to the room by a pneumatic hammer, preventing contamination of the screed and entry of foreign inclusions.
- Leveling the floor. The distribution of the prepared mixture is carried out, guided by the beacons from the mixture and a laser level. Leveling is performed manually using a rule, achieving a surface of the same level. This process requires experience and qualification; only then will the height difference not exceed 2 mm per 2 m, similar to mechanized semi-dry screed. Since the mixture naturally loses moisture, all manipulations must be performed quickly and smoothly.
- Grinding. This stage involves compacting the top layer and creating an ideally flat surface ready for installing the final coating. The optimal time for grinding is within an hour: it is important that the top 2 cm of the coating have not yet set and can be processed. Manual and machine grinding are distinguished. The first is performed with a trowel, the second with a grinding machine operated by an operator in concrete stages. For better adhesion, a small amount of water is applied to the surface. The machine compacts and levels the top layer.
Semi-dry screed with your own hands in an apartment ends with cutting expansion joints; the area should not exceed 36 m2. This stage relieves stress in the layer, prevents cracks and tears, and allows the mixture to form a high-quality monolithic block.
![[Exclusive] Noise Master Series: Review of flagship headphones](https://teranews.net/wp-content/uploads/2025/09/frame_19522-360x220.webp "[Exclusive] Noise Master Series: Review of flagship headphones")